
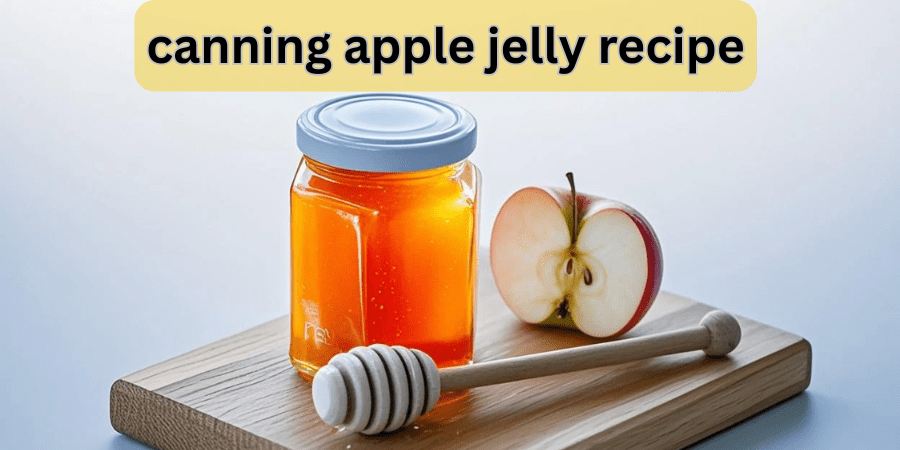
When I first started learning about canning, I followed a canning guide that showed how a simple recipe using powdered pectin, apple juice, and a single apple could lead to homemade jelly that tasted incredibly fresh and sweet, almost like the flavor you get on a trip to an apple orchard in late summer’s bounty; watching that fruit simmer into jelly felt truly magical, especially when filling each jar and placing it onto the shelf in my pantry, knowing that everyone could enjoy something beginner-friendly, easy, and genuinely delicious, whether spread over crackers with cream cheese or eaten in the cold months of winter, long after leaving the apple orchard, and although it took a little hard work to make, it reminded me of my grandma’s way of doing things the natural way using powdered pectin, turning something tart into something rewarding, and that experience made the next batch of homemade jars feel even more satisfying.
How to Make Apple Jelly at Home-The Answer
If you’re searching to try more canning recipes like jelly and jam for enjoy, you can get approachable ideas to get you started
The Ingredients and tools You’ll Need
When I first learned how to make sweet apple jelly, I didn’t realize how important the basics were. You start with fresh apple juice, either regular juice from the store or something you make yourself from quartered apples with the blossom ends trimmed. I learned that adding bottled lemon juice helps keep the right acidity so the jelly stays shelf-stable, and mixing in powdered pectin (the natural compound that helps jelly gel) is what lets it set during cooking. A little butter works better than you’d expect because it cuts the foaming on top, and you only need a little bit, which I didn’t believe until trying it myself. You can choose organic cane sugar, granulated and smooth, and it doesn’t change the color or flavor like brown sugar sometimes can. I remember testing raw versions of sugar at first, but that slowed the process, so I stuck to what works for most people.
When canning jelly later, it truly helps to have a reliable canner with a water-bath setup, since that keeps every jar safe and sealed. You will need half-pint jars because they hold just enough for a batch without being too large. I once tried getting jars online, but places like Walmart, Menards, and Farm & Fleet saved me the trouble because the bundles weren’t expensive, especially when they included the right tools. Inside those bundles you’ll find lids, rings, and what you need to ensure a tight seal, which always feels like starting new again, even after years of doing it. I learned through trial and error that choosing trusted brands takes the guesswork out, and while some steps feel optional, following the method keeps the work simple and helps prevent problems that cause foam later. Nothing feels as satisfying as lifting jars from the canner and knowing each one will stay stable on the shelf for months.
Best Apple for jelly
Use fresh, ripe apples without soft spots or any signs of rot.
When you want the best batch of jelly, it truly starts with choosing fresh, ripe apples. I learned early that if your apples have soft spots or any sign of rot, it can throw off the flavor and texture. It’s actually recommended to mix in some underride apples, because they give a better set due to their higher natural pectin. I once tried using only very ripe apples, but the batch turned loose, almost like underset jam, and some pieces turned mushy. Since then, I lean toward jam apple varieties, especially when not eating fresh.
In my own kitchen, Crabapples, Yellow Transparent, Granny Smith, McIntosh, and Garvensteins have made some of the clearest jelly I’ve ever cooked. Tart apples are always the hero when making jelly, and they outperform sweet apples every time. I did try overripe apples once because they were on hand, but the batch never set firmly, which reminded me why choosing the right fruit matters. Now, I keep a mix of firm apples and slightly underripe ones to get that perfect spoon-glide consistency that makes the jelly shine.
Using apple juice makes this recipe incredibly simple and beginner-friendly.
When I first tried making jelly, I wanted a simple approach, so I began with apple juice instead of cooking down apples. Using ready-to-use juice made the recipe truly beginner-friendly, especially because I didn’t have to deal with straining or waiting for juice to drip from cooked fruit. I remember how smooth the process felt, and it helped me stay focused on the fun part jelly-making instead of handling pulp and extra cleanup. I also noticed that Store-bought juice had a consistent flavor, which gave nice clarity in the jar when compared to homemade juice, where different apple varieties can change taste and even affect pectin levels.
Later, I experimented with both types and found that adjusting sugar becomes easier when starting with a stable base, especially when aiming for the easiest jellies with predictable results. The idea of beginning from fresh apples has its charm, and I still do it sometimes, but when time is tight or I’m making multiple batches, that clear bottled juice really helps me stay productive without losing quality. It almost feels like having a shortcut that still gives a beautiful finish, and it keeps the process relaxed for those days when I want something that sets nicely without extra waiting.
Here are a few of my favorite tips to help you make the perfect jelly every time.
When I make jelly, I always Measure carefully so the balance of juice, sugar, and pectin helps it set properly and gives a smooth texture. Once the mixture reaches a full rolling boil, I keep it boiling even when stirred, because that’s when the pectin activates and the jelly sets. I add a little butter to reduce foam, which gives a clearer jelly without bubbles to skim off later. I also Work quickly, using a ladle to pour the jelly into jars while it’s still hot and liquid, since waiting can start gelling in the pot. I always Avoid doubling a batch, because Jelly sets more evenly when made in small batches, often doing back-to-back batches instead.
How to Make and Can Apple Jelly (Step-by-Step Guide)
Step 1:
Before I start working with fruit, I always Prep my workspace by setting out clean jars, because once things heat up there’s no time for delays. I begin by washing them well, letting water run through each jar, then placing them into the canner or large pot before turning on the heat so they warm gradually. I also Wash the lids and rings in warm, soapy water, because keeping them spotless helps the seal stay secure. While that warms, I like to Whisk together apple juice with pectin, making sure it’s somewhat combined, even though it does not fully dissolve; what matters is that it becomes evenly distributed so that later the jelly sets properly without lumps.
Step 2:
At this stage, I pour the mixture into a sturdy saucepan, though some people prefer a Dutch oven when making jelly in larger batches. I drop in a bit of butter, then place it over medium-high heat so the liquid moves toward a rolling boil. When I add sugar, I do it in one addition, then keep Stirring almost constantly so nothing gets stirred unevenly. Once it begins to boil hard, I let it go for about a minute, and then gently Skim off any foam that rises before I remove it from the stove, which keeps the jelly looking smooth and bright.
Step 3:
When the jelly starts looking thick while boiling, I always Test the gel stage by taking a spoonful of hot jelly and placing it on a cold saucer that I keep in the freezer ahead of time, and then I let it cool for a moment. I run my finger through the little puddle that forms, and if the texture separates cleanly, I know I can move forward; but if it still feels thin, I return it to a soft boil and let it go a bit hard, repeating this testing every minute until the desired consistency appears.
Step 4:
Right after the jelly reaches the right stage, I Fill the clean and hot jars with the fresh jelly, making sure to Check that the headspace stays close to ¼”, and if not, I keep adjusting until it looks right. Then I Wipe the rim of each jar with a wet cloth, put the lid on, and place the ring over it, tightening only to fingertip level so it stays tight but does not overtighten, which helps the jars seal properly during processing.
Step 5:
Once everything is sealed, I Place the filled jars into hot water inside the bath canner, and wait until the water reaches a steady rolling boil, because that step helps the jars process for a full 10 minutes and allows the lids to seal. After that time passes, I Remove the jars from the heat and let them cool for about five minutes before placing them on a towel, leaving them undisturbed for 18-24 hours, which always gives me the best setting and clarity in homemade jelly.
Step 6:
When I start jelly-making, I like beginning with real apple flavor, so I take prepared apples and place them into a stainless steel saucepan, covering the fruit with cold water, usually close to a cup, even though some days I measure by 240 ml or by the lb, sometimes even 454 g when I want precision; then I let it boil over medium-high heat, always stirring just enough so it does not turn dark or start scorching, and once softened after a few minutes, I gently mash them like a soft potato mixture before pouring everything into a bag or strainer lined with layers of cheesecloth sitting over a deep bowl so the liquid can drip slowly overnight, and I never squeeze it because I learned early that doing so makes the juice turn cloudy, which affects the shine of the jelly later.
Step 7:
After the juice is finished dripping, I move toward making jelly, but sometimes I pause and keep it stored in an airtight container inside the fridge for a few hours, usually around 18-36, especially when preparing multiple cups, maybe near 960 ml, depending on the batch size and the recipe I follow. During that pause, I Prepare the setup for the next step by getting the boiling water ready, gently simmering my canning gear so I do not rush later, and always Sanitize the lids and rings by washing them carefully because clean storage gives the jelly its best shelf life.
Step 8:
When I reach this stage, I take a deep stainless saucepan and combine the apple juice with a little lemon and sugar, then let it boil gently at about medium-high heat so everything can melt together and dissolve smoothly. As it thickens, I watch closely for the gel stage, and I usually check this by watching the temperature reach around 220°F, sometimes noting it as 104°C depending on the sea level, using an instant thermometer for accuracy. If I do not have one nearby, I simply place a bit on a cold plate and touch it with a spoon to see whether it sets properly, which has always helped me know when to move forward.
Step 9 (Final Step):
At this point, I Quickly pour the hot jelly into each jar, making sure the headspace looks right before I take a silicone spatula to release hidden bubbles, which I then adjust carefully. I always wipe the rim until it feels truly clean, often using a paper towel, and then set the lid with the band tightened just to fingertip strength. I Place the jars together, filling up the rack so none of the remaining jars sit unevenly, because a steady rolling environment helps the jars process for 10 minutes depending on altitude. When done, I remove them gently and wait for the seals to settle, giving them 18 to 24 hours untouched. Before storing, I sanitize my half-pint spaces and the pot, especially when I am making more than 6 jars, and I try to avoid burning myself by waiting a minute before lifting the jars to skim around the surface. Using a funnel makes it easier to ladle jelly into already sanitized jars sitting on the rack, leaving about two inches clear, and when the timer rings, I use a jar lifter, set them aside for 18-24 hours, and let them cool in a dry corner before loosening the rings.
Storage Guidance:
When I make apple jelly at home, I always check the seal by pressing the middle of the canning lid once the jar has fully cooled. If it does not flex, I know the jar is sealed properly, which means it is shelf-stable and safe to store. I keep those sealed jars in a cool, dark spot of my pantry, and they stay preserved at peak quality for 12-18 months or even longer. I learned this after seeing slight degradation in color, flavor, and texture when a batch sat beyond 12+ months, though it was still safe to eat because the lid stayed fully sealed. When a jar is opened, I always put it in the fridge and use it within 2-3 weeks, and this timing has never failed me.
If I want to keep Frozen jam longer, I slide a jar into the freezer, and it sits happily for about 1 year without losing that special sweetness. After it is thawed, I keep it refrigerated and enjoy it within a short window so it stays bright and balanced. I love how versatile this pantry staple is—some mornings I use a spoonful in oatmeal or yogurt, other times I warm a bit for glazing pork or chicken, or use it as a filling for thumbprint cookies, or spread it over biscuits and toast, always reaching for that dependable jar stored in a cool, dark place.
Ways to Enjoy Your Apple Jelly
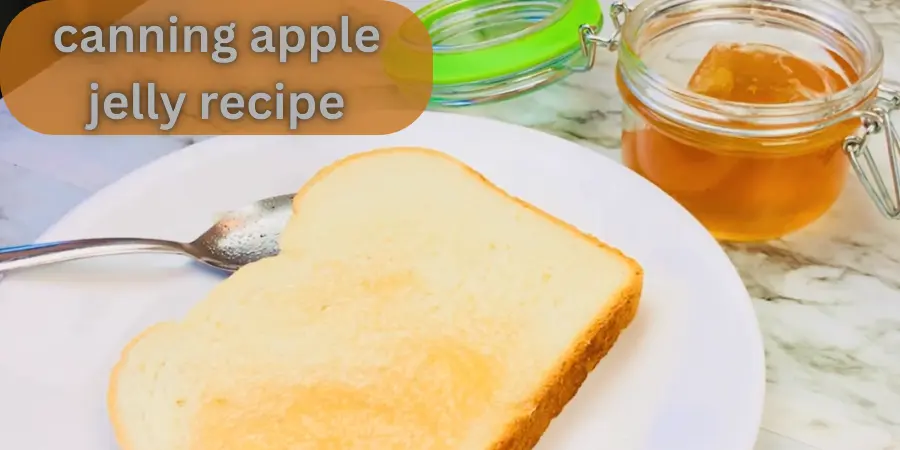
When you finish canning your own apple jelly, it feels good to bring something with a mild flavor and truly versatile character into your kitchen. I often start my morning by spreading it on toast, biscuits, or English muffins, and it melts slightly, giving the right sweetness. Sometimes I roll it inside Dutch style pancakes or regular pancakes as a warm grab-and-go snack, especially when mornings are busy. When I make homemade yogurt, I swirl in a spoonful and let that gentle flavor blend through, and that same idea works with oatmeal or even steel cut oats made in a slow cooker. A friend once stirred some into a simple cocktail, which surprised me, but the sweetness balanced so nicely. And when I use my soft sandwich bread recipe, it becomes an easy PB&J, but richer than a store-bought jar could ever make.
For dinners, a bit of this same jelly works as a condiment, especially beside slow cooker honey glazed ham or bourbon glazed ham, and sometimes I brush on a quick glaze over chicken or pork chops, letting it caramelize. On weekends, I place it near cheeses, turning it into part of a small cheese board without needing a long deep dive into pairings. It even fits into baking; it can become a gentle filling for cakes or cupcakes, or tucked neatly into shortbread thumbprint cookies. I once served a spread during a holiday gathering, and it felt just like building a Thanksgiving charcuterie board, only scaled down, but still impressive, all with something so familiar as homemade apple jelly.
Conclusion:
From my own kitchen experience, working with grape jelly feels easier when I remember what I learned from a canning apple jelly recipe, because the tools, timing, and care stay almost the same, and that familiarity builds confidence; I still set out clean jars first, rely on a steady water-bath canner, and respect the balance between juice, sugar, and pectin, lessons that came from many quiet afternoons watching fruit turn glossy and smooth, and even with grapes, that same patience matters, since choosing good juice, keeping the boil strong, and filling jars while everything is hot makes the shelves reliable later; I’ve learned that canning is less about rushing and more about rhythm, the small habits passed down from experience, where the reward is opening a jar months later and tasting something that feels homemade, steady, and real, the kind of result that only comes when you trust simple steps, your hands, and the process you’ve practiced over time.
FAQs:
How to make apple jelly from whole apples?
When I make apple jelly at home, I start by washing the fresh apples and cutting them into quarters, placing them in a large pot with enough water so they soften evenly over gentle heat; once they release juice, I strain it through a cheesecloth-lined colander, and I like to weigh the liquid so I can add just the right amount of sugar, usually close to 80%, before I cook it on medium heat while stirring to keep it from sticking, and I keep skimming the foam that forms because it gives a clearer jelly, then I carefully transfer it, still hot, into a sterilized jar, a step I learned after doing it often, which helps seal it tightly and keeps the sweetness bright for months.
How long to water bath can apple jelly?
When the mixture begins to Boil, combine apple juice, pectin, a little butter, then Stir in sugar and let it boil for 1-5 minutes. Quickly Ladle the jelly into clean jars, leaving about ¼” headspace. Then Process the filled jars in hot water using a bath canner for about 10 minutes, and allow the minutes to pass so everything seals well and stays safe.
Why add lemon juice to apple jelly?
When I first tried making apple jelly at home, I learned that Lemon juice is not just for flavor; it was added because its acidity works with natural pectin in apples to help the mixture set properly, especially when simmering alongside small batches of homemade spreads like jams or jellies, and once it thickens, you may notice how smooth the texture becomes Without ending up with runny syrup, since the balance is essential and beginners often have trouble understanding that even a small squeeze makes the difference.
How long will canned homemade jelly last?
When I make apple jelly, I always plan how much of my homemade batch my family will actually enjoy within a year, because any home-canned foods kept too long on the kitchen shelf tend to lose their quality. From experience, I have found that the recommended time to keep jelly is about a year, and most of my jellies and jams get used up before then, especially when the flavor is at its best, so I store jars where I can see them easily on the pantry shelf.
Why is my apple jelly not gelling?
When making apple jelly, I once tried a larger batch of about three half-pint jars per recipe, and learned that you cannot rush it because the mixture needs a full rolling boil after you add sugar, and if heat goes down before it is done, the gel will not activate, so I now recommend using two separate pots when scaling up, because it keeps the liquid boiled, cooks more evenly, and allows a quick spoon test from above, and once I saw the thicker stage, tiny bubbles, and smooth drop, I could describe it as properly set, proving that long cooking truly matters and is based on holding that boil longer while stirring less.
Ready to Make your Own Jelly?
If you are ready to try a homemade batch, this recipe makes the process feel simple and quick, almost like bringing orchard memories into your home kitchen; when I first tried making apple jelly, the sweetness reminded me of walking near an orchard, and storing jars in my pantry made it even more satisfying, especially after learning from a guide that explained how a water bath works in basic canning, and because I was still learning, I liked how beginner-friendly the steps felt, especially when using ingredients that deliver a rich taste, helping me feel confident about making smooth jelly that fits nicely in jars.
2 Comments
Pingback: Grape Jelly Canning Recipes: You’ll Wish You Tried Sooner! | Foody on Home
Pingback: Peach Jelly Canning Recipe – 8 Step Guide for Beginners (Low-Sugar Option) - Foody on Home